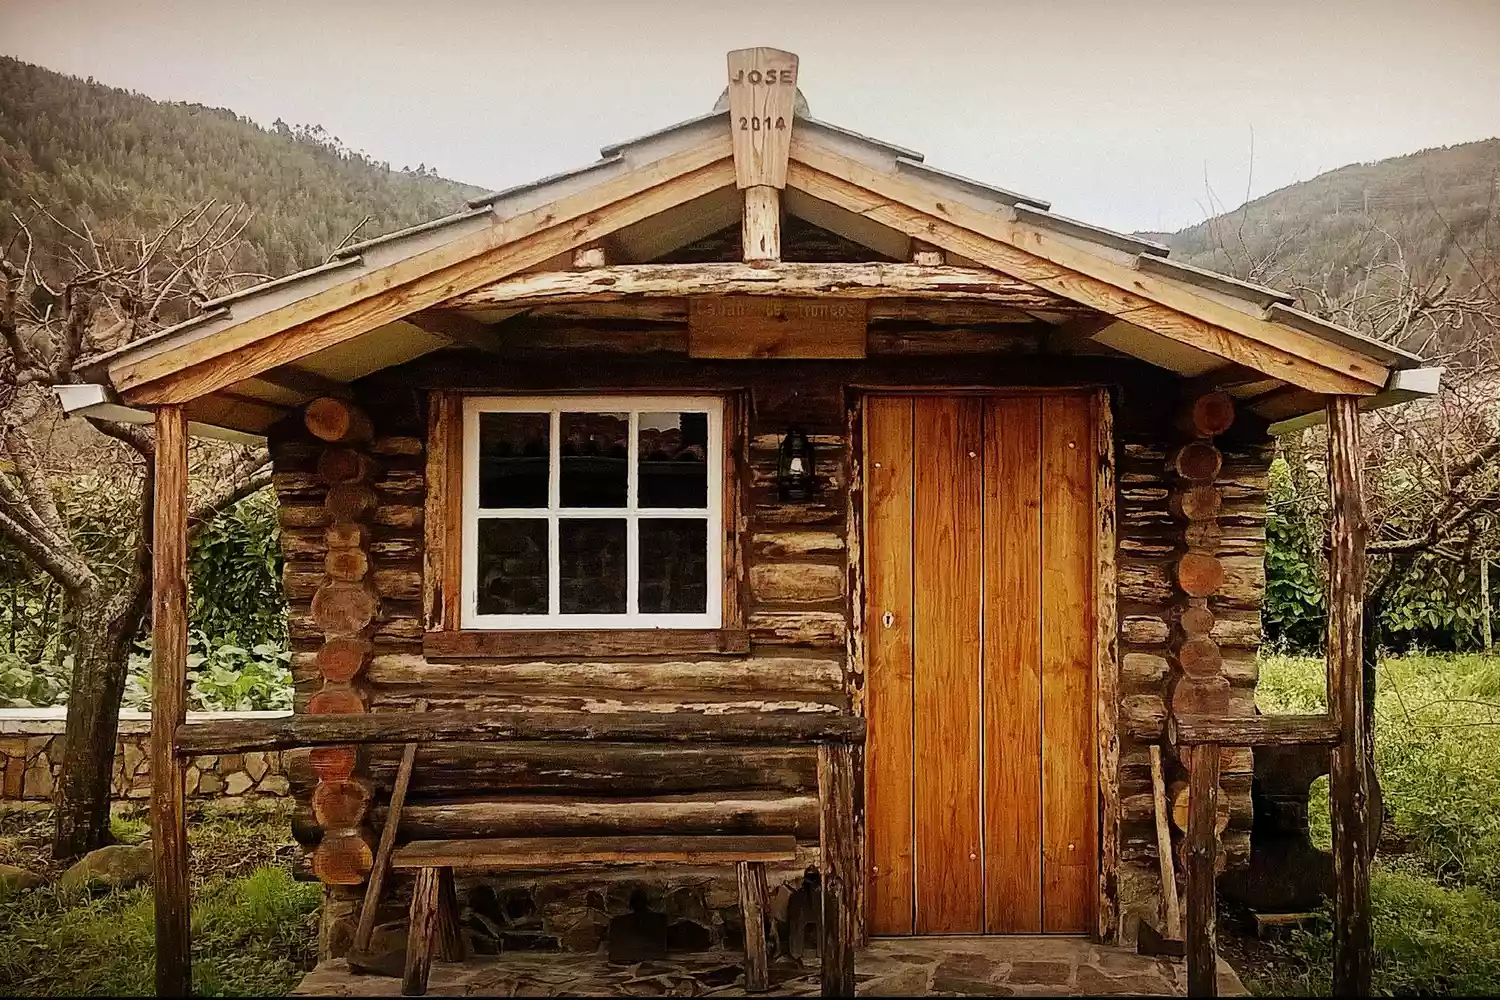
Log cabins beckon us into their cozy confines with rustic charm, inviting us into their intimate embrace for solace. Not only can these rustic retreats serve as idyllic places of refuge but they are also incredible showcases of craftsmanship. In this meticulous step-by-step guide we begin exploring this process – discover its wonder and discover your woodland haven through nature’s forces combined with ingenuity; with expert advice and insights to aid us on creating your very own woodland haven!
By weaving our narrative with an honest and trustworthy tone, our aim is to empower you to fully embrace this timeless architectural endeavor. Let’s embark together on this creative adventure where authentic beauty of log cabins meets with professional expertise needed to bring your visions into being!
Step One : Cut, Transport and Decabark of Trunks
Step one of an engaging journey should involve selecting suitable logs for your cabin – usually pine and eucalyptus are popular due to their durability and aesthetic appeal. After selection, logs must then be cut, transported and debarked prior to construction.
Step Two : Cut Boards to Acknowlege Door Opening
Establishing the entrance to your log cabin is an integral component of its construction, and here we explore how to cut board for doors with precision so they blend with its overall design.
Step Three : Foundation and Base of the Cabin
An adequate foundation is crucial to the stability and longevity of a log cabin. Learn the materials required and techniques involved in creating one using stones and concrete as it creates a stable platform on which your cabin stands.
Step Four : Consignment and Settlement of Trunks
Once the foundation is in place, assembling the main structure begins. This step involves carefully positioning and settling of trunks until they achieve optimal structural integrity.
Step Five : Cutting Gables and Installation of Beams
Gables and beams play an essential part in supporting the roof and designing an appealing cabin interior. Learn techniques for cutting gables and placing beams correctly for optimal visual results with suitable roof gradient.
Step 6: Install Lining, Insulation, and Roof Protection Systems (LRPS)
Step Two involves installing insulation to provide a comfortable living environment and exploring various roof options such as an initial green roof plan and cement tiles as a possible choice.
Step 7: Seal Cracked Logs Together
As part of your efforts to strengthen and weatherproof your log cabin, sealing its gaps between logs is critical to its structural stability and weatherproofing capabilities. Discover which materials work best in filling these cracks firmly enough that moisture cannot get in through them or drafts can enter through.
Step 8: Arranging Floor and Installing Stones on Balcony and Concreting Murete
Crafting an interior space that’s functional yet visually appealing is crucial when creating a log cabin. Explore different flooring options and techniques for arranging floors; also, add stone elements onto balconies for aesthetic purposes, as well as build concrete murete for added aesthetic and functionality.
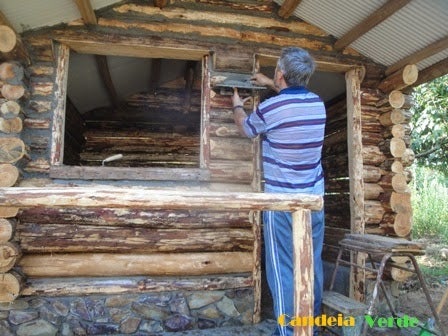
Step 9: Install Doors and Window Openings
Step one in creating the exterior design of your log cabin involves the assembly and installation of its door and windows, including their proper fit, weatherproofing, and secure fitting. In this step we offer detailed instructions to make this step an easier experience for everyone involved.
Step 10: Treatment to Protect Wood
Maintaining the longevity and integrity of your log cabin is of utmost importance, which is why this final step provides information about using used cooking oil as a treatment to safeguard it against weathering, insects and decay in order to make sure that its lasting value.
Watch the video below to see the process:
Additional Info
It should be noted that this log cabin was constructed entirely by one individual – showing their dedication and skill required for such an undertaking. Cutting, transporting and debarking took approximately two months until completion was reached.
Launch your log cabin construction journey armed with this comprehensive guide and unleash your creativity, authenticity, and corporate professionalism to produce an incredible woodland retreat that stands as testament to your craftsmanship.
Source:Instructables.com